안녕하세요, 송코딩입니다.
맥북 또는 맥(Mac)에 C언어 개발 툴로 유명한 Visual Studio Code를 설치하는 방법을 한번에 정리해보았습니다.
Windows는 그냥 Visual Studio 를 설치해서 바로 사용하시면 되는데,
맥북은 XCode라는 애플 자체 개발 툴을 지원하는 등 다른 개발툴에 대한 호환성이 아쉽습니다.
맥북에서는 Visual Studio가 C/C++개발용으로 지원하지 않습니다.
대신 Visual Studio Code를 설치하셔서 추가 환경 설정을 해주시면 보다 가볍게 사용할 수 있습니다.
설치 순서는 다음과 같으니, 조금 긴 내용이지만 차근차근 따라오시면 무리 없으실 거에요 :)
#1. 다운로드
#2. Extension(확장 도구) 설치 :: 3개 설치 + 디버거 설정
#3. 컴파일할 때 필요한 셋팅값 설정 (빌드 환경 설정)
#4. 실행 설정
#5. C/C++ 컴파일러 설치 :: homebrew & xcode 환경 설치
그리고 많은 분들이 해당 게시글을 찾아주셔서, 감사드리는 마음에 블로그 글을 하나씩 따라가는 visual studio code 설치 영상을 준비해보았습니다!
아마 글로만 보시는 것보다, 영상이랑 같이 보시면 단계별로 훨씬 쉬우실 것 같아서요~
글에서 생략된 부분들도 설명되어 있으니, 조금이나마 도움이 되셨으면 좋겠습니다~!
그럼, 화이팅입니다!
#1. 다운로드
1-1. visual studio code 설치 링크 접속 (https://code.visualstudio.com/download)
Download Visual Studio Code - Mac, Linux, Windows
Visual Studio Code is free and available on your favorite platform - Linux, macOS, and Windows. Download Visual Studio Code to experience a redefined code editor, optimized for building and debugging modern web and cloud applications.
code.visualstudio.com
1-2. Mac 클릭
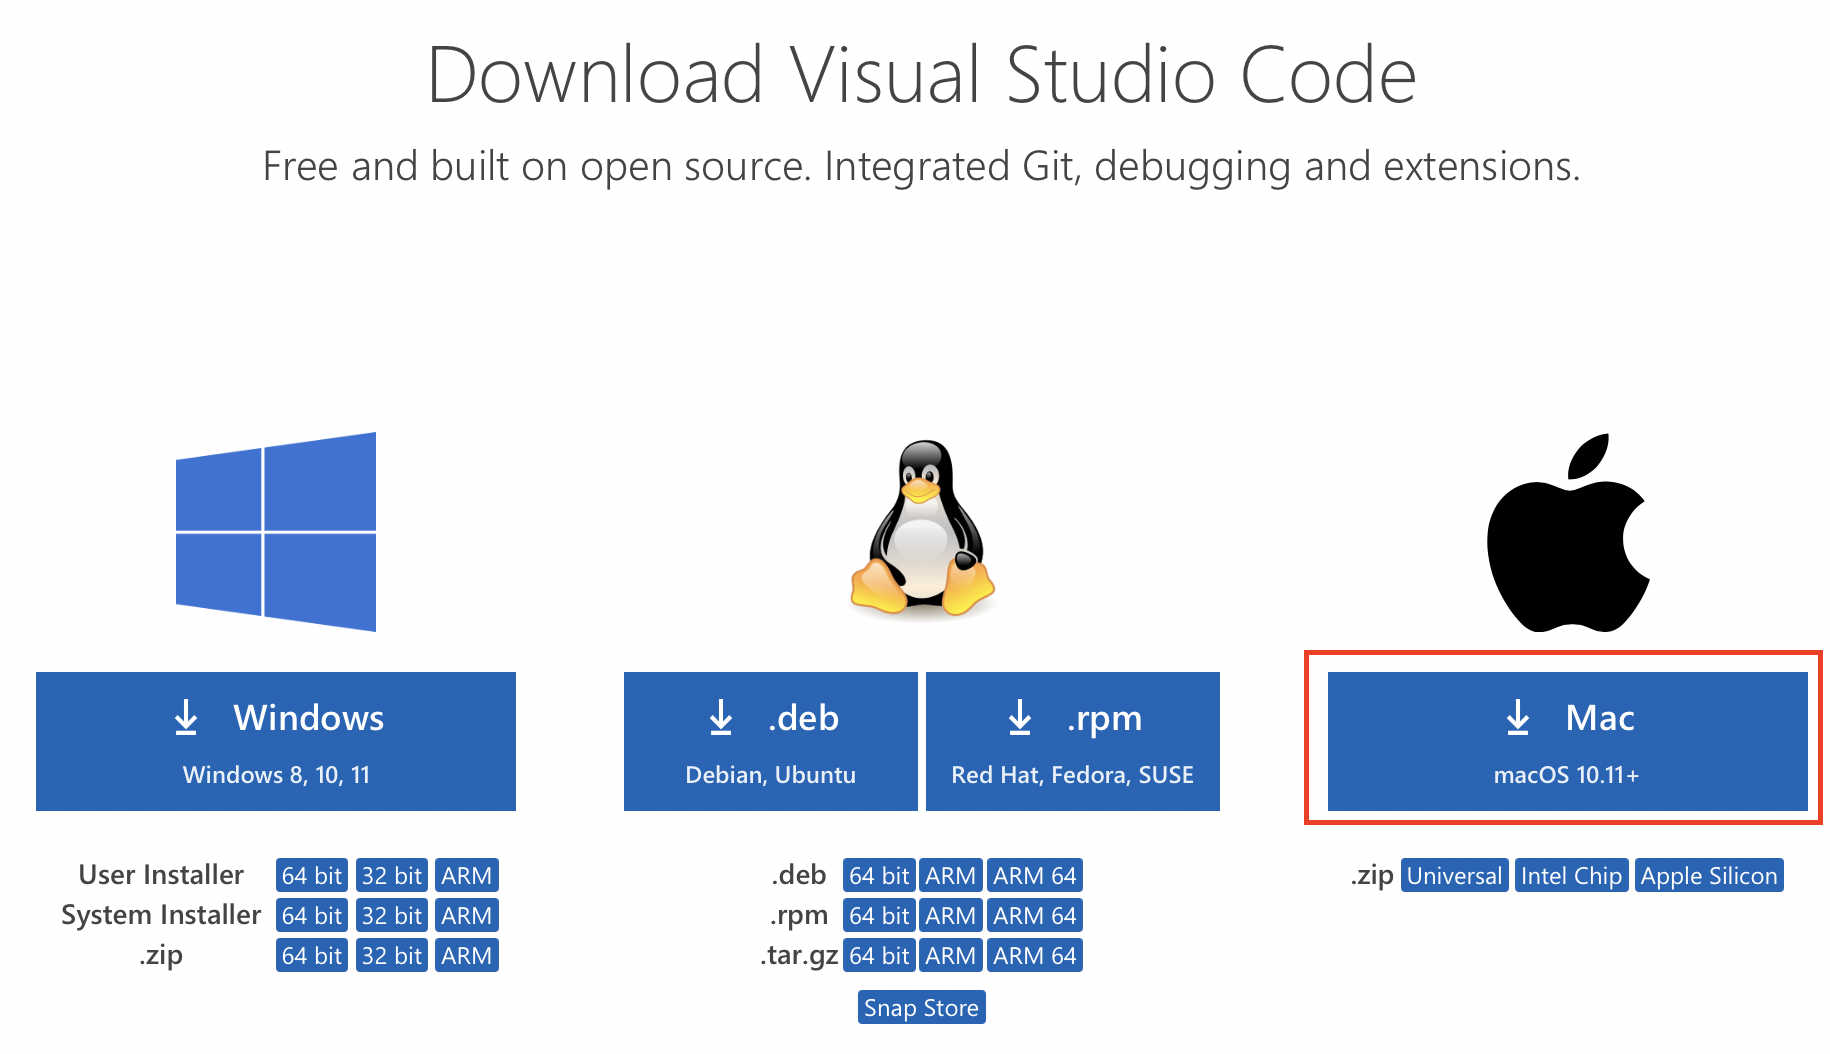
1-3. 다운로드 허용

1-4. 다운로드 받은 Visual Studio Code 열기

1-5. 열기 허용
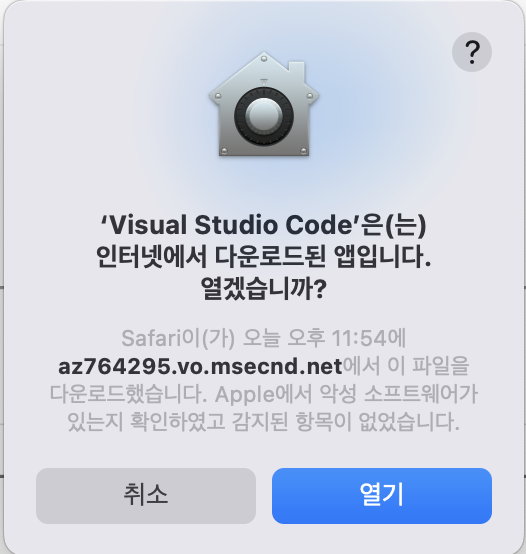
1-6. 다운로드 완료!

여기까지 잘 따라오셨다면, 설치는 잘 된 거에요 :)
Visual Studio Code는 원래부터 C언어 개발을 위한 툴이 아니라, 텅텅 빈 아주 가벼운 툴 상태 입니다!
그래서 우리가 추가 설정을 통해, C언어 개발을 할 수 있도록 환경 셋팅을 해주셔야 해요.
우린 그걸 Extension(툴 확장 도구) 설치를 통해 해결할 수 있습니다.
#2. Extension (확장 도구) 설치
우리는 3개의 Extension을 설치할 거에요.
2-1. Extension 메뉴 클릭 (왼쪽 가장 아래 메뉴)
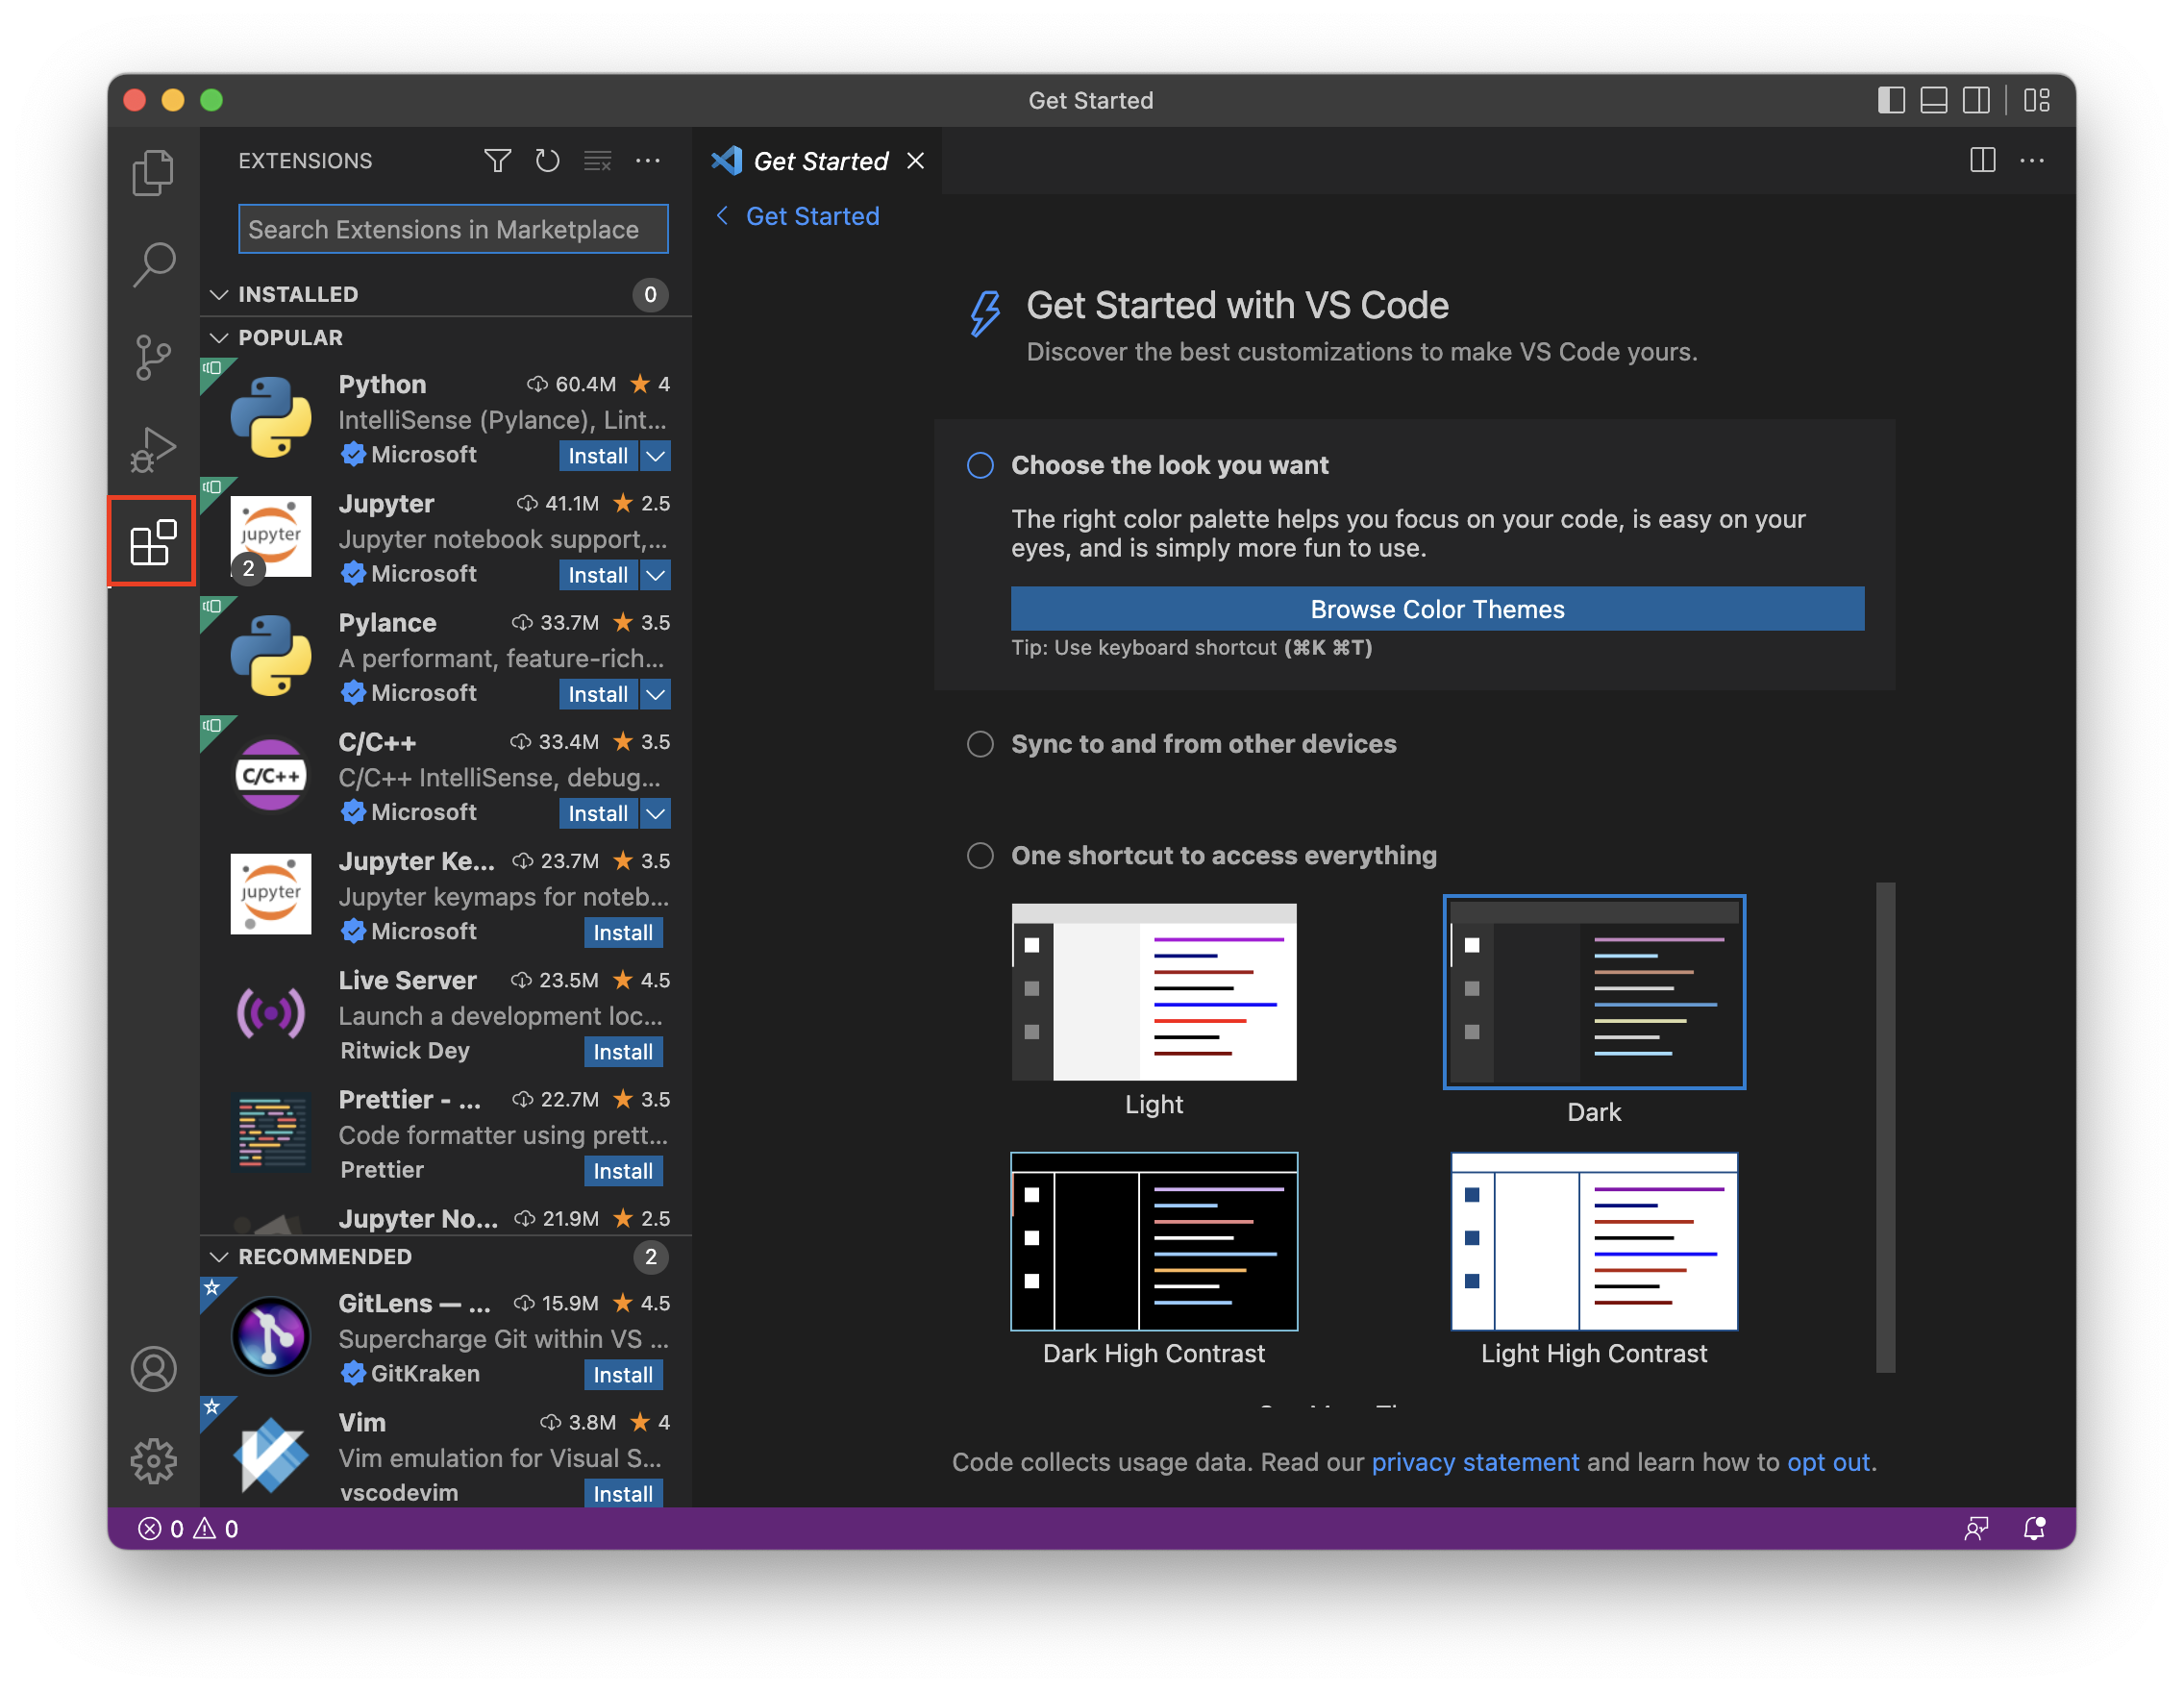
2-2. C/C++ 설치
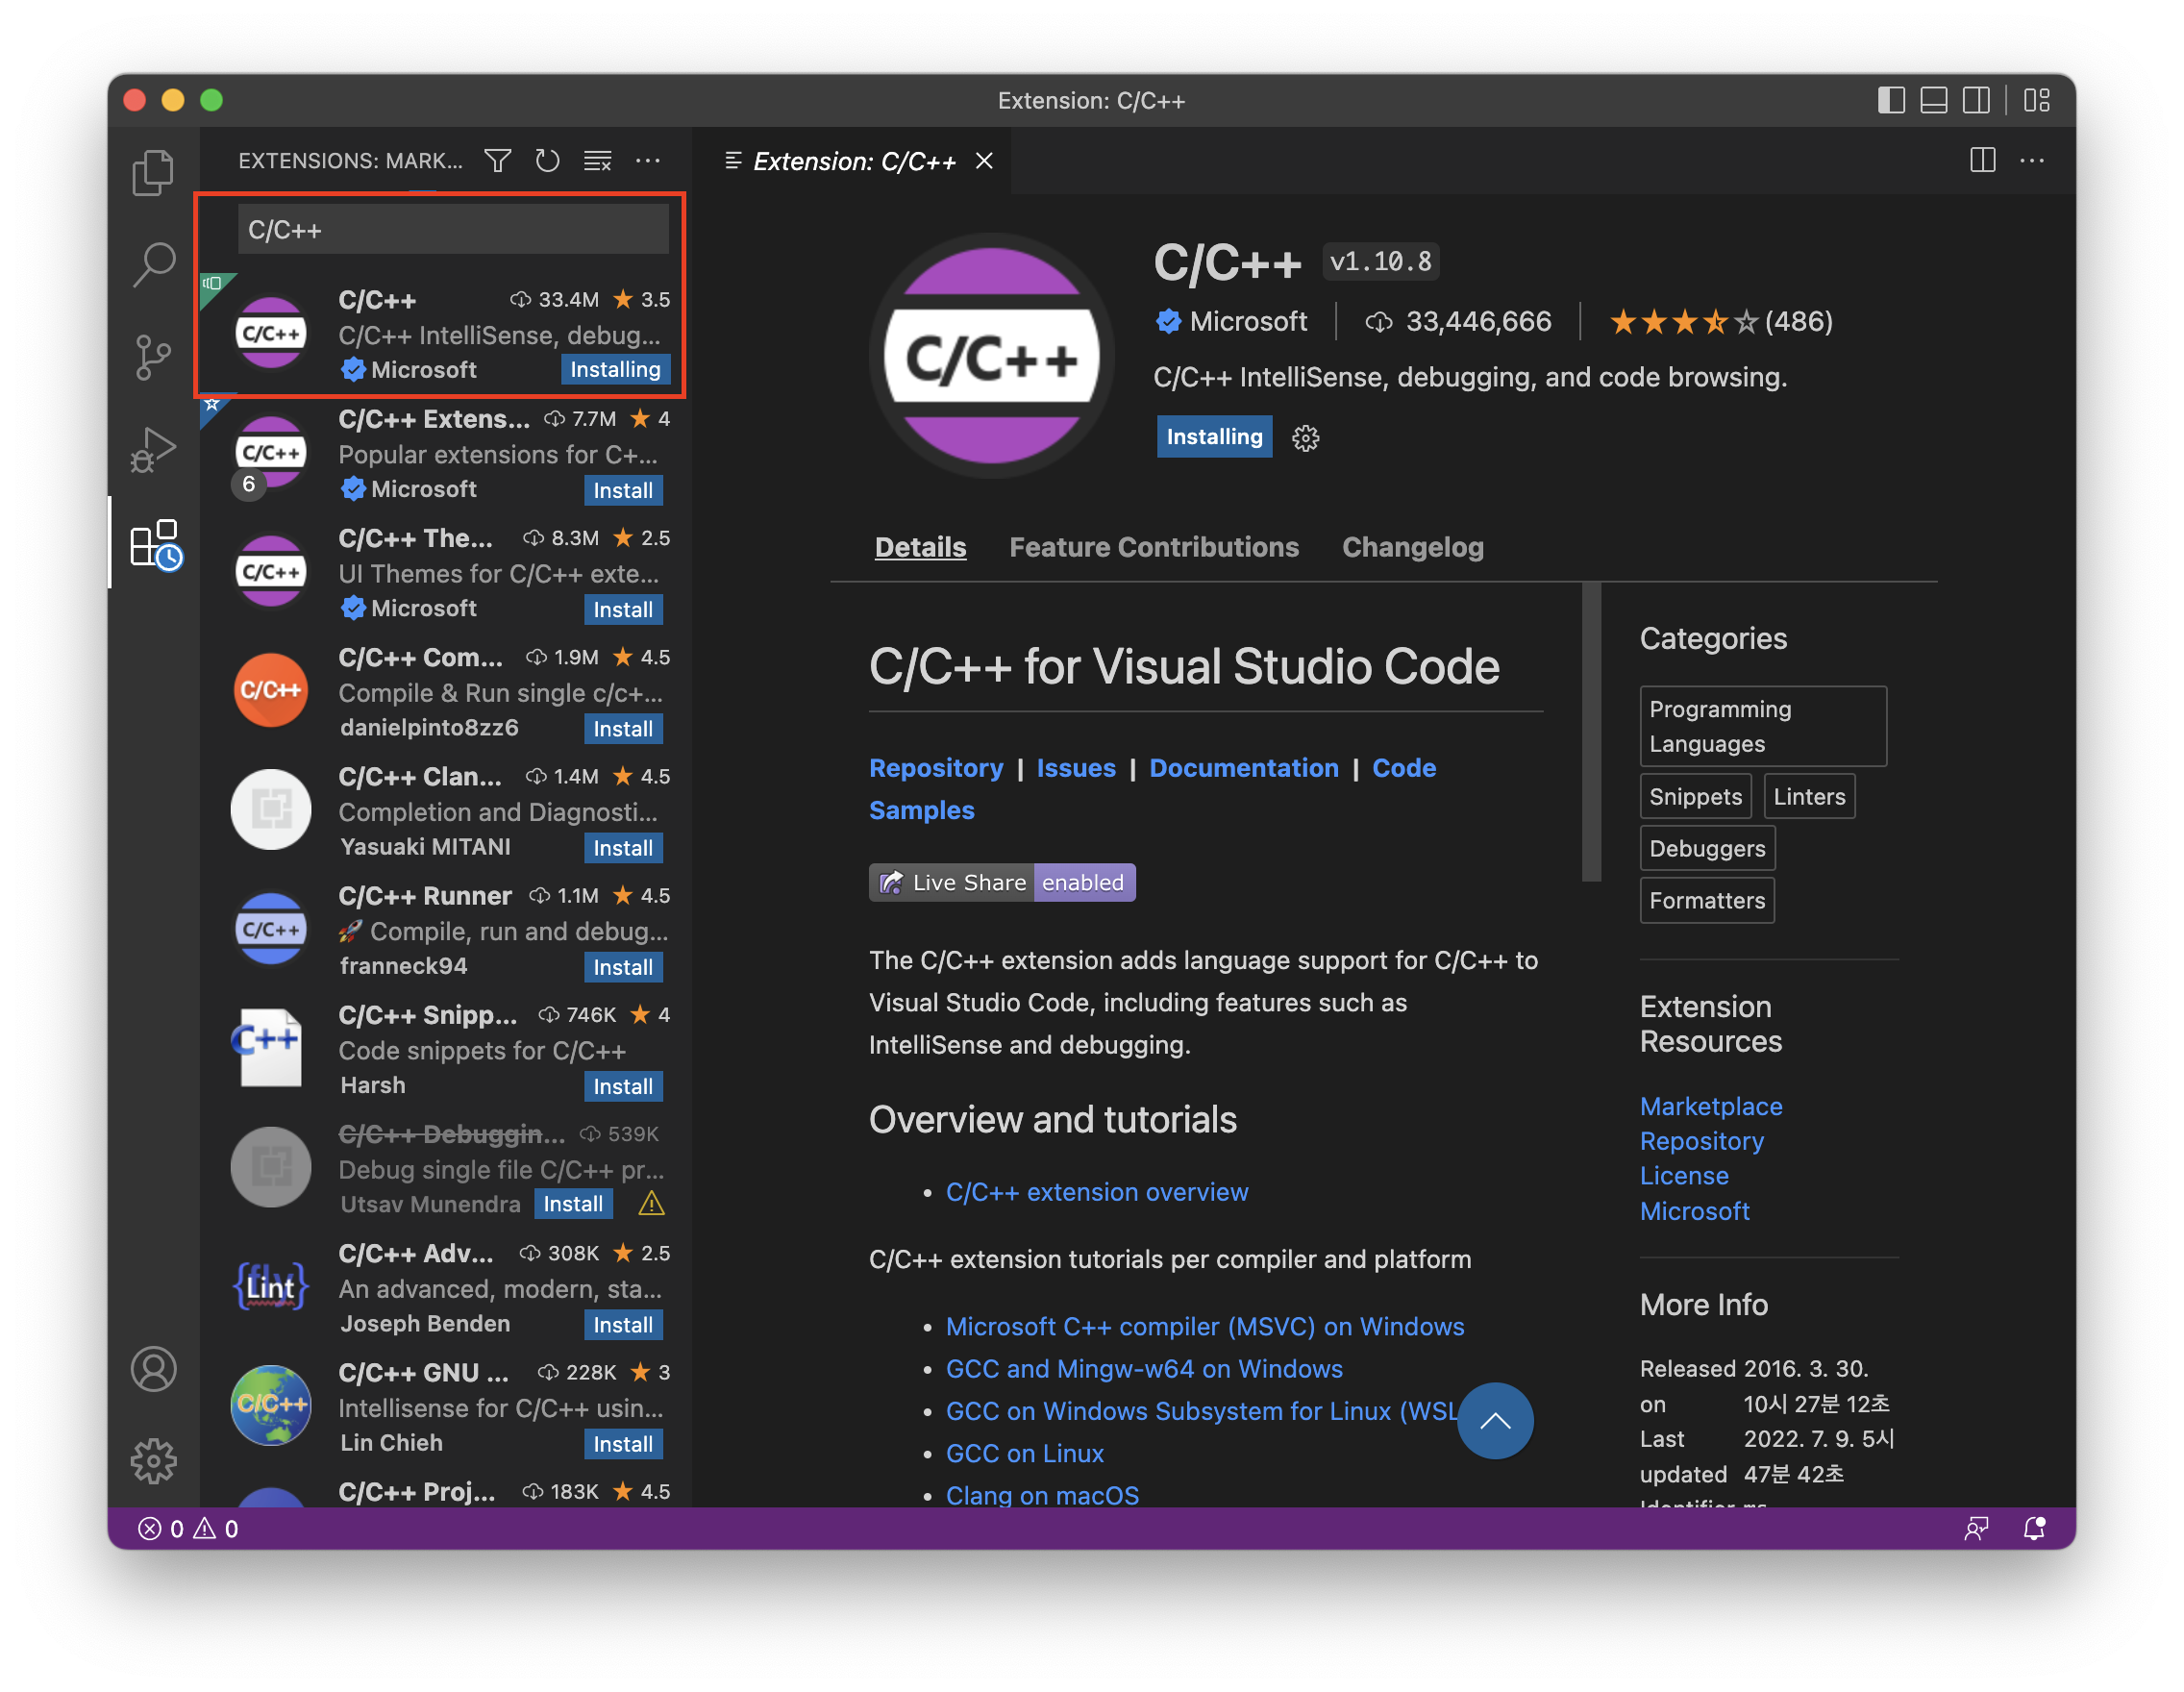
2-3. Code Runner :: 코드를 실행시켜주는 확장 도구
2-3-1. Code Runner 설치

2-3-2. Extension Settings

2-3-3. Code-runner: Executor Map → Edit in setting.json 클릭

2-3-4. 아래 내용을 추가하고 저장 (Command + s)
| { "git.ignoreMissingGitWarning": true, "code-runner.runInTerminal": true, "C_Cpp.updateChannel":"Insiders", "editor.multiCursorModifier": "ctrlCmd", "C_Cpp.default.cppStandard": "c++17", "C_Cpp.default.cStandard": "c11", "code-runnder.executorMap": { ... |

2-3-5. 코드 실행 단축키 설정 : Command + k + s
>> "Run Code" 검색, 키 설정 되어있는지 확인 (안 되어있으면 편한 값으로 설정)

2-4. CodeLLDB :: 디버깅을 해줄 확장 도구
2-4-1. CodeLLDB 설치

2-4-2. Debug 메뉴로 이동 (왼쪽 네번째 메뉴) --> create a launch.json file 클릭

2-4-3. debugger 선택 : C++을 위한 debugger

2-4-4. launch.json 생성

2-4-5. launch.json 기존 내용을 아래 내용으로 전체 교체
| { "version": "0.2.0", "configurations": [ { "type": "lldb", "request": "launch", "name": "Lldb debug", "program": "${fileDirname}/${fileBasenameNoExtension}", "args": [], "cwd": "${workspaceRoot}" } ] } |

3. 컴파일할 때 사용할 셋팅값 설정 = tasks.json 파일 만들기
3-1. Visual Studio Code 상단에 [터미널] 탭 -> [작업 구성] 선택

3-2. [템플릿에서 tasks.json 파일 만들기] 선택

3-3. [Others] 선택

3-4. tasks.json 생성 완료!

3-5. tasks.json 내용을 아래 내용으로 전체 교체 해줍니다.
tasks.json 에서 전체 선택 (command + a) -> 아래 내용 전체 복사 -> tasks.json에 통으로 붙여넣기
- 아래 내용은 빌드를 할 때(실행할 준비를 할 때) 어떤 언어로 할 건지 기재되어 있습니다.
1) C build for clang : c언어로 작성된 코드를 빌드하겠다는 것
2) C++ build for clang++ : c++로 작성된 코드를 빌드하겠다는 것
|
{
"version": "2.0.0", "tasks": [ { "type": "shell", "label": "C bulid for clang", "command": "clang", "args": [ "-g", "${file}", "-o", "${fileDirname}/${fileBasenameNoExtension}" ], "options": { "cwd": "${workspaceRoot}" }, "presentation": { "clear": true }, "group": { "kind": "build", "isDefault": true }, "problemMatcher": [] }, { "type": "shell", "label": "C++ bulid for clang++", "command": "clang++", "args": [ "-g", "${file}", "-o", "${fileDirname}/${fileBasenameNoExtension}" ], "options": { "cwd": "${workspaceRoot}" }, "presentation": { "clear": true }, "group": { "kind": "build", "isDefault": true }, "problemMatcher": [] }, { "type": "shell", "label": "execute", "command": "${fileDirname}/${fileBasenameNoExtension}", "group": "test", "presentation": { "clear": true } } ] } |
3-6. 빌드 (실행할 준비)
3-5 에서 설정해 둔 빌드를 실행하려 합니다.
- 빌드 단축키 : Command + Shift + b
- C언어로 실행시킬 것이기 때문에 C build for clang을 선택해줍니다.

4. 실행 설정
1) 단축키 설정 (Command + k + s)
2) "run test task" 검색
3) 편한 키로 설정 (저는 command + R 로 했습니다.)

5. 마지막 단계! C/C++ 컴파일러 설치 :: homebrew & xcode 설치
5-1. 맥북 오른쪽 상단 [검색(돋보기 버튼)] 클릭 -> terminal 실행

5-2. 아래 코드 그대로 복사 & 붙여넣기 입력하고 엔터
| /bin/bash -c "$(curl -fsSL https://raw.githubusercontent.com/Homebrew/install/master/install.sh)" |
그럼, 아래와 같이 맥북 잠금화면 비밀번호 치라고 나옵니다. 맥북 켤 때 사용하는 비밀번호를 작성합니다.
| ==> Checking for `sudo` access (which may request your password)... Password: |
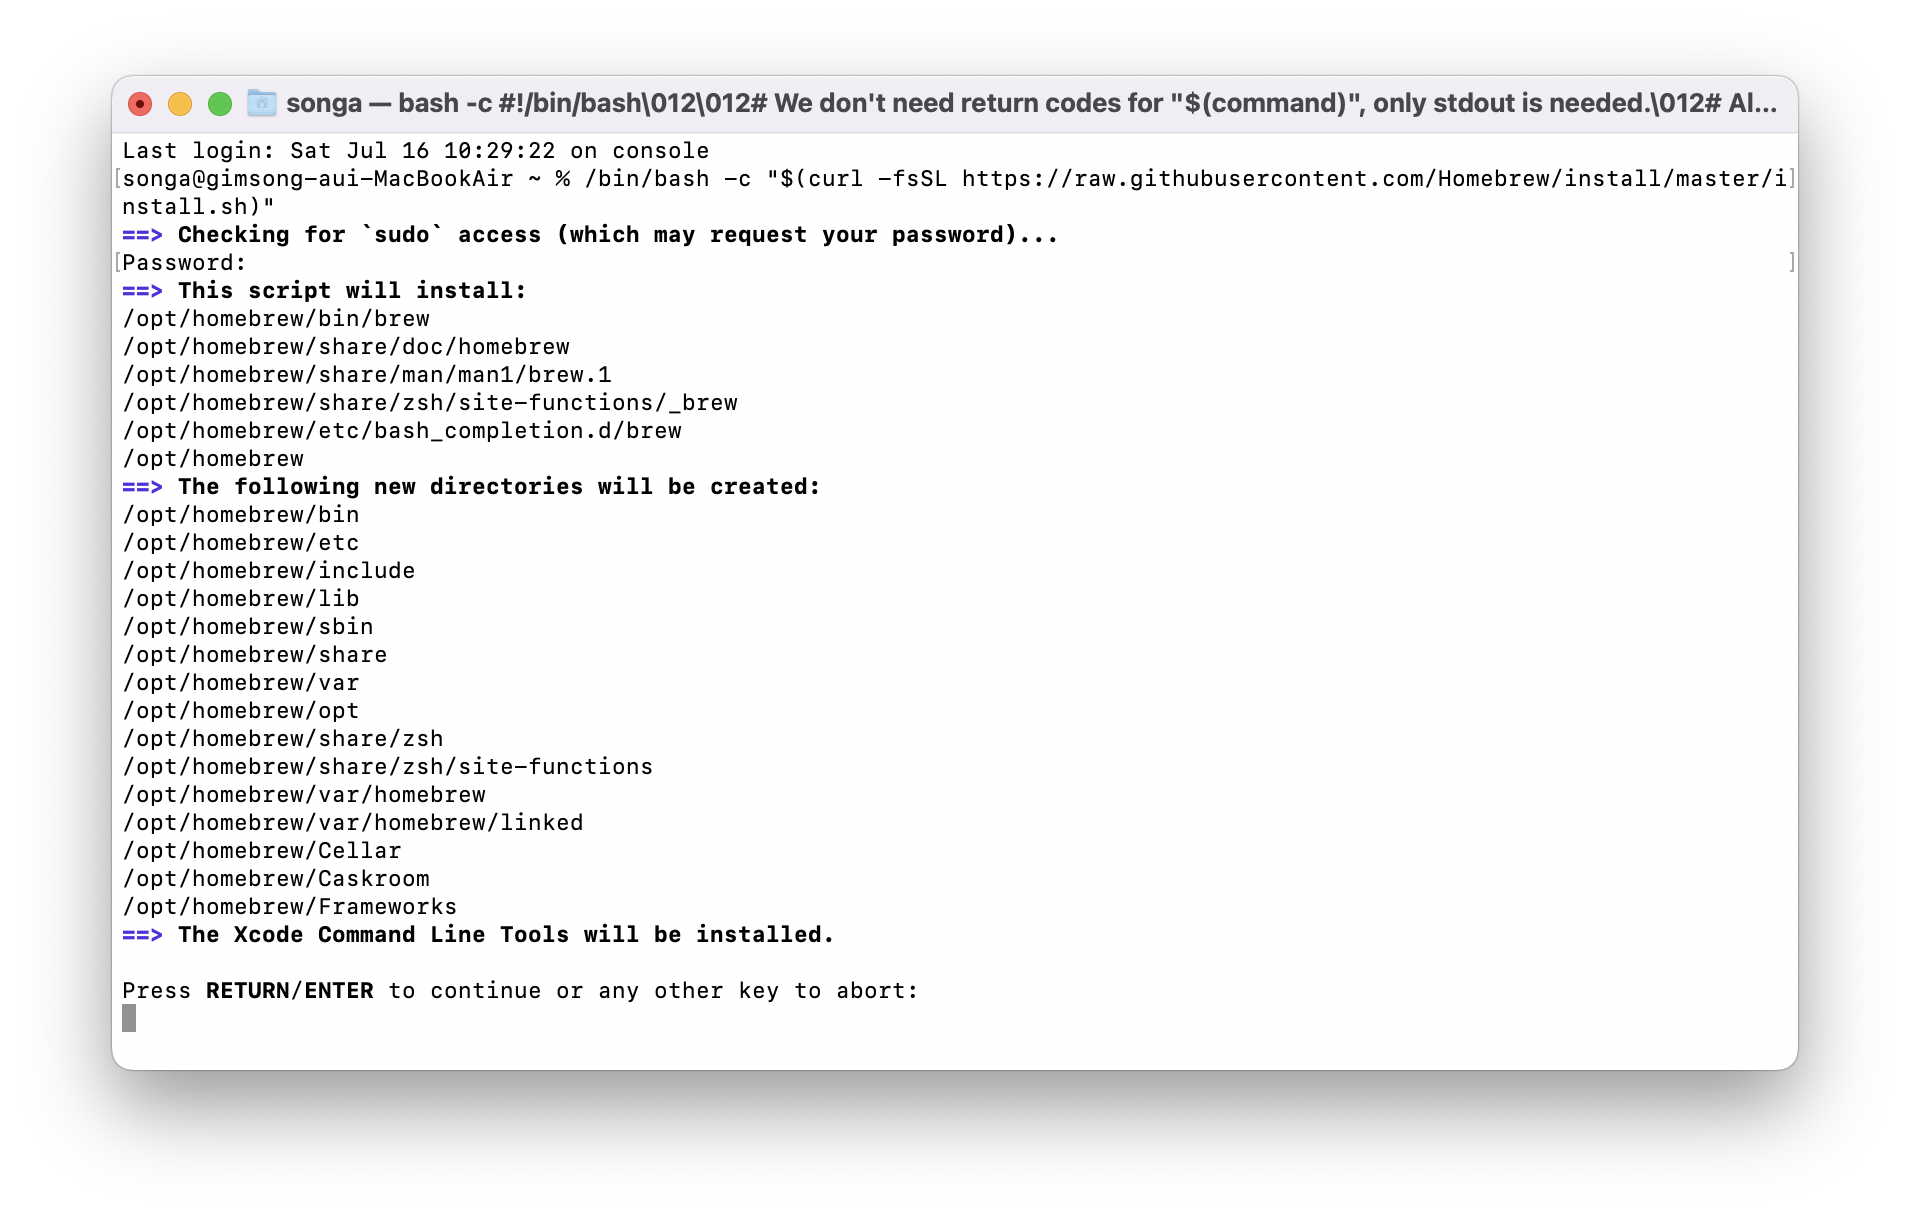
Press RETURN/ENTER to continue or any other key to abort: 문구가 나오면 엔터를 한번 더 칩니다.

아래 문구가 나오면 설치가 종료 된 것입니다.
| ... ==> Next steps: - Run these two commands in your terminal to add Homebrew to your PATH: echo 'eval "$(/opt/homebrew/bin/brew shellenv)"' >> /Users/songa/.zprofile eval "$(/opt/homebrew/bin/brew shellenv)" - Run brew help to get started - Further documentation: https://docs.brew.sh |
아래 명령어를 입력했을 때,
| gcc -v |
아래와 비슷하게 나온다면 성공적으로 설치된 것입니다. (숫자와 경로는 다를 수 있습니다.)
| Apple clang version 13.1.6 (clang-1316.0.21.2.5) Target: arm64-apple-darwin21.4.0 Thread model: posix InstalledDir: /Library/Developer/CommandLineTools/usr/bin |
설치가 완료되었습니다!!
이제 신나게 공부해보시면 되겠네요 :)
긴 글 따라오시느라 고생 많으셨습니다!
감사합니다.
김송아 드림
Reference. https://csdiary.tistory.com/2 & https://stg0123.github.io/study/5/
'Programming' 카테고리의 다른 글
| JPA란? (0) | 2022.09.10 |
|---|---|
| 코드컨벤션이란 code convention :: 송코딩 (1) | 2022.09.08 |
| [C언어] Visual Studio 설치 :: 송코딩 (0) | 2022.08.02 |
| Visual Studio 새로고침 :: 송코딩 (0) | 2022.07.04 |
| [1분만에 이해하기] 콜백함수란 대체 무엇일까 (Callback) (0) | 2022.06.16 |
